
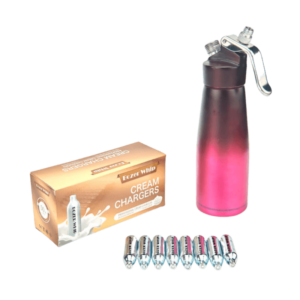

This is a cartridge or stainless steel cylinder that is filled with nitrous oxide (N2O) gas.
The gas is the whipping agent that you will add to your whipped cream dispenser. The mouth of the charger is covered with a foil covering that usually breaks to release N2O when inserted into the charger holder.
How Does a Whipped Cream Dispenser Work?
To understand how this device works, you first need to know what parts it is made of.
Whipped cream dispensers are made up of a bottle and head. The bottles are usually made of aluminum or stainless steel and they range in size from 1/4-liter, 1/2-liter, to full liter. The dispenser heads, on the other hand, are made of composite plastic, stainless steel, or aluminum.
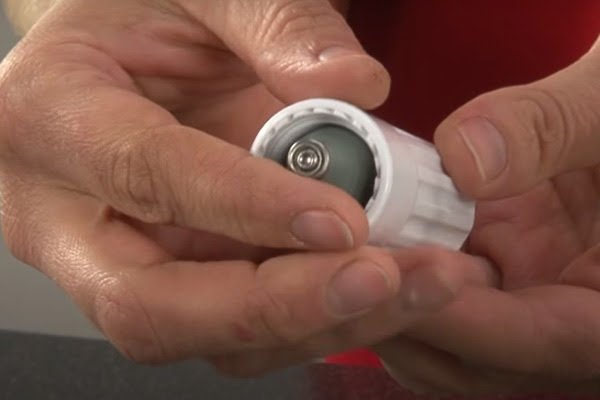
Inside the dispenser head, you will find a head gasket and a head valve. The gasket is inserted into the head to give it its proper seal on the whipped cream dispenser. The gasket must be properly inserted to ensure an adequate seal. The options for gaskets include silicone or rubber. I prefer using silicone gaskets when preparing warm or hot foams. This just gives you a few more options.
The head valve is a simple seal with an entrance hole. The pressurized cream will dispense through the valve tip of the dispenser. The different models I have used allow for the removal and cleaning of the head valves. But the more expensive models are designed in such a way that the head valve will not come out.
Unfortunately guys there’s no standard size. So, you must verify the head valve that’s suitable for your whipped cream dispenser. The head gaskets also come in variable sizes. So, again it’s very important to confirm which size is ideal for your dispenser.
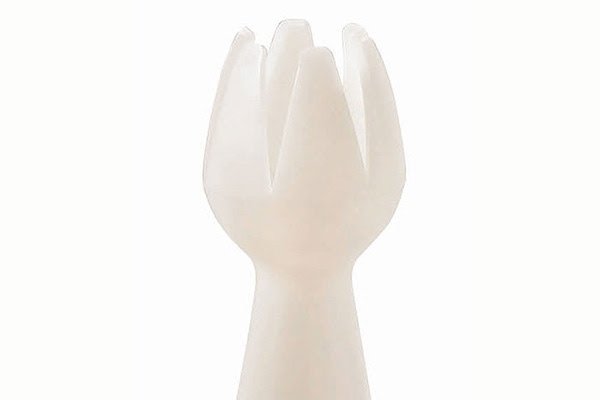
Then you’ve got the tips, which are typically made out of plastic. The ISI tips screw directly onto the head, whereas some models like the Mosa screw on with a different accessory or what’s called a coupler. Normally, the tips are straights or tulip shape.
The cartridges or chargers are pierced by a pin that is installed in the whipper’s head by the manufacturer. You should never remove or change the pin. The pin pierces the charger and gas enters into the bottle through the piercing pin.
Finally, there’s the cartridge holder. Its function is fairly simple, just as it is called, it holds the cartridge. Place one of your whipped cream chargers inside and thread it into the dispenser head. As you thread the cartridge holder, it pushes the gas into the piercing pin. The gas evacuates the charger and enters the bottle. Give the dispenser a good shake and voila you’ve got your whipped cream.
How to Use Whipped Cream Dispenser & Chargers
The pressurized cartridge is filled with nitrous oxide. All you have to do is insert the cartridge into the charge holder and then thread it to the dispenser head.
The piercing pin on the dispenser head will break the foil covering on the cartridge to release the gas into the liquid. A charger usually contains 8 grams of N2O.
When you pull the trigger of your cream whipper, the contents of the bottle will be released under pressure. At the same time, the encaptured molecules of the gas will expand.
For the best results, I normally include a thickening agent (fat) in my recipe to prevent the gas from bubbling out and disappearing into the thin air.
How to Use Whipped Cream Dispensers & Chargers
What You Will Need
- Heavy liquid whipping cream
- Liquid flavoring syrup
- Powdered sugar
- Whip cream charger
- Whipped cream dispenser
Step By Step Break Down
Whipped cream dispensers & chargers are so easy to use at home and add so much great flavor in several ways. Let me show you how easy it is to use them.
Step 1: Preparing the Ingredients List
Liquid cream.
First, I need to gather all the ingredients and items I will need. These include half a liter of heavy liquid whipping cream with a milk fat content of at least 32 percent, a whip dispenser, a whip charger that is filled with nitrous oxide, and a liquid flavoring syrup-like powdered sugar or vanilla. I will avoid using granulated sugar in this process.
Step 2: Adding Ingredients into the Dispenser
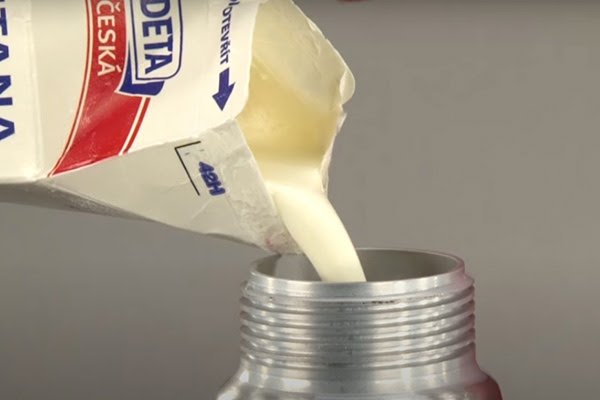
Add ingredients.
I will start by measuring half a liter of cream and pour it into the dispenser or just fill up to the fill line of my dispenser. Then I will add maple syrup into my cream. At this, my whipping cream and my flavor are inside the dispenser. So, I will just go ahead and put my dispenser lid on.
Step 3: Pressurizing the Dispenser
Pressurize the canister.
Now it’s time to pressurize the canister. To do this, I will have to remove the charger holder, insert the nitrous oxide cartridge inside the holder, and then screw the holder with the charger inside into the dispenser head until I hear a whooshing sound. The whooshing sound lets me know that the charger has been pierced by the piercing pin and that the gas is now inside the dispenser.
Step 4: Shaking the Dispenser

Shake the contents.
Once the gas has been released into the dispenser, the next important thing I need to do is shake the contents to create a homogenous solution. I usually give the canister ten to twenty shakes until I feel it getting cold.
I normally prefer to unscrew the holder holding the cartridge once the gas has been dispersed into the dispenser. But it’s okay if you leave it on until you are done creating your whipped cream.
At this point, if I wasn’t using my whipped cream dispenser right away, I could store it in the refrigerator until I’m ready to eat my delicious pie.
Step 5: Screwing the Correct Attachment
Attach a tulip tip
This is my favorite stop of the entire process because the attachment I choose will define the kinds of patterns I can create with my whipped cream.
My favorite attachments are straight, star, and tulip nozzle. But I always use the tulip nozzle for my most unique decorative applications. I could also use injector tips, which are suitable for injecting, spherification, filling, and precise decoration.
Attaching a nozzle to the dispenser head is quite simple. All I have to do is screw on the attachment until it’s tight. Give it one more shake and voila I’m ready to create my whipped cream.
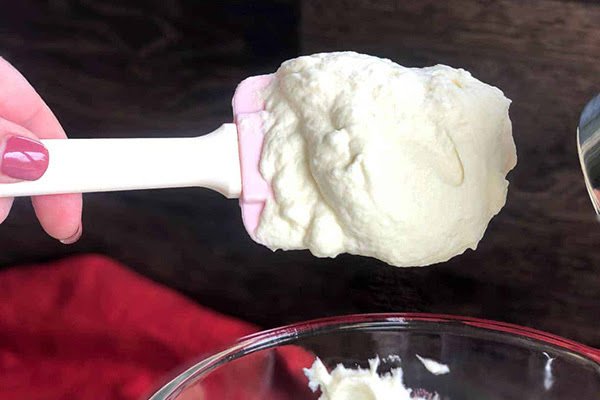
Step 6: Whipping the Cream
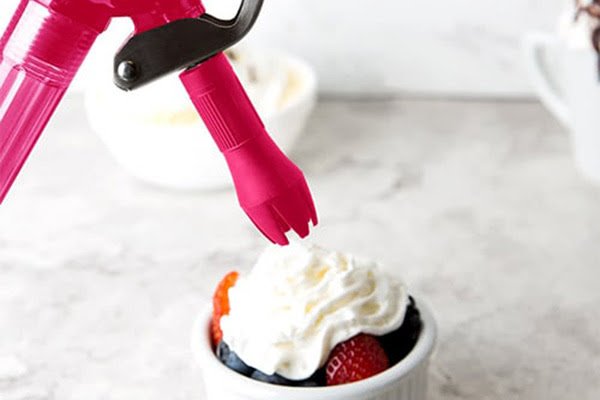
Create the whipped cream.
At this point guys I’m ready to create mouthwatering filled pastries, cake, crackers, coffee, sundaes, ice cream, or pie.
I will first give the canister ten to twenty shakes to properly mix the contents. Then I will turn the dispenser upside down at a full 180° angle and gently depress the trigger. As the cream is released, I would gently swirl the tip to give the cream a beautiful and delicious appearance.
How to Clean a Whipped Cream Dispenser
In addition to knowing how to use whipped cream dispensers & chargers, you also need to know how to clean the whipper. This is something I usually do after creating delicious desserts. Here are a few things I do during the cleaning process.
Step 1: Expel Any Remaining Cream and Remove the Charger
I usually start my cleaning process by pressing the lever until the dispenser is completely empty and has been pressurized. Then I will remove the whipped cream charger from the holder by unscrewing the holder from the dispenser head.
Step 2: Disassemble the Device
Then I will remove the head by unscrewing it from the dispenser. After separating the head, I will detach the decorator tip, pull the valve out of the dispenser head, and pull out the head gasket.
Step 3: Clean Each Part Separately
I prefer cleaning each part separately. I usually rinse the dispenser parts with warm water and a cleaning agent. I use a brush to clean the nozzle tip and the dispensing valve. Then let all the parts air dry separately before assembling them again for storage.
Note: I usually don’t use special stainless steel cleaning agents, abrasive sponges, or scouring agents to avoid damaging the parts. I also don’t clean the charger holder in the dishwasher.
Troubleshooting A Whipped Cream Dispenser
It is not uncommon to come across a few troubleshooting problems when learning how to use whipped cream dispensers & chargers.
Stuck Lever
Every now and then you’re going to come across a very stubborn dispenser where the lever doesn’t want to move. It gets stuck in place. What you don’t want to do is try to unscrew the head. If that happens, you’re going to get an incredibly messy cream flying everywhere in your kitchen.
It can also be very dangerous because the pressure from the cartridge inside the bottle can literally shoot the head right up into your head. So, what I would do is unscrew the tip and/or coupler. Take a hand towel and place it over the top and push it down onto the head valve.
I prefer doing this over the sink to avoid messing up my kitchen. Air and pressure will release once the valve is pressed down. Then reattach the tip. This should help solve the stuck lever problem.
Clogged Nozzle
Another common problem I have encountered when using whipped cream dispensers & chargers is a clogged nozzle. But here is the thing, there are a few hacks I will share with you that will prove helpful if you happen to experience a clogged nozzle.
The first thing that I always advise people to do is thoroughly shake the dispenser after adding the ingredients and inserting the nitrous oxide. I prefer shaking the dispenser ten to twenty times to properly mix the liquid cream with the gas molecules for the best-whipped cream.
The next amazing thing I would do is change the nozzle angle from 90° to 60°. A 60° angle allows the whipped cream to come out smoothly without clogging the nozzle.
If the nozzle is still clogged, you should consider running the bottle under warm water (but not the tip). This will help if the cream in the dispenser is coagulated. Your cream may coagulate when the butterfat comes together. The warm water will help relax the butterfat, allowing the whipped cream to come out smoothly.
Sugar and leftover butterfat may congest the nozzle, which will definitely clog it. What I would do in this case is turn the dispenser upside down (remember not to stick anything to the nozzle) in a cup of warm water. Then wipe the nozzle and shake the dispenser ten to twenty times before pressing the lever.
Leaking Nitrous Oxide
There is a time when I charged my ISI cream dispenser, the nitrous oxide was leaking from the top. At first, I tried to adjust the head gasket and tighten the seal, but it still leaked. Then I figure it out, my gasket head was dirty and that’s why my dispenser was leaking gas. All I had to do is thoroughly clean the gasket to restore its functionality. Apart from a dirty head gasket, any other leakages may be due to a bad or failing dispenser head.
FAQs
1. Can I Use Carbon Dioxide Cartridges in Whipped Cream Dispensers?
I remember using CO2 cartridges once out of curiosity and I had an acidic taste on my filling. Are you familiar with the fizzy sensation experienced when drinking carbonated drinks?
Well, that’s what you get when you try to use CO2 cartridges with your whipped cream dispenser. Nitrous oxide is an inert gas that doesn’t produce any acidic taste or fizzy sensation.
2. Why Is the Cream Coming Out Inconsistency?
Your dispenser head is probably dirty and that’s why you are getting an inconsistent discharge of the whipped cream.
The best thing you can do is detach the dispenser head and then detach all the removable parts like the nozzle, gasket head, and head valve. Clean the parts with soap and warm water. I prefer using a brush to help clean all the dirt, especially from the nozzle.
You may also experience inconsistency if the cream to gas ratio is off. You can improve the gas to the cream ratio by shaking the dispenser a few more times. This will help to properly mix the gas with the cream for the best-whipped cream results.
3. Why is the Nozzle Shooting Out When I Connect the N2O Charger?
When you pressurize the canister and the nozzle shoots out, then you should know that nozzle is either failing or bad. But before you make that conclusion, you should check to confirm that the gasket head is not lacerated or dirty.
4. How Many Chargers Do I Need My Dispenser?
You will need one to two chargers for a half-pint dispenser and one-pint dispenser, and two to three chargers for a one-liter dispenser. Don’t overcharge your whipped cream dispenser.
5. Can I Dispense Cream with the Head Facing Up?
Whipped cream dispensers are not engineered to dispense upwards in any way. The instructions that come with cream whippers strictly recommend you hold the device upside down. Holding it right side up will vent the gas and the cream will not get out that way. The cream is much heavier than nitrous oxide. So, the gas will find its way up. To depressurize the gas, you will have to hold the canister upside down.
6. How Long Can a Pressurized Whipped Cream Dispenser Last?
N2O is characterized as a bacteriostatic gas, which is great because it prevents bacterial growth. So, you can effectively store the pressurized canister in the fridge for up to fourteen days.
Final Thoughts
In addition to using whipped cream dispensers and chargers correctly, I have also provided you with additional hacks for cleaning and troubleshooting a cream whipper.
Choose us, a top-tier manufacturer of whipped cream dispensers & chargers, soda siphons, and more. Visit greatwhips.com.